The Problem with Always-On AI
Most AI development tools operate like an endless conversation—you can chat with them 24/7, burning through tokens and credits with every interaction. This leads to unpredictable costs, unfocused work sessions, and a lot of expensive trial-and-error. What if there was a better way?
Introducing the Night Shift Developer
NightAgents changes the script on AI-assisted development. Instead of always-on access, you get a dedicated AI co-worker that operates during one specific 8-hour window (or less than 8 hours depending on your choice): while you sleep.
Think of it as hiring a junior developer in the perfect timezone. They work the night shift, you review their work in the morning, and the cycle repeats until the works gets done.
How It Works
1) The Evening Handoff
Before bed, you brief your NightAgent like you would any co-worker:
- Define the scope: “Tonight, refactor the authentication module and add unit tests”
- Provide context: Share relevant files, documentation, or background
- Set priorities: What’s most important if time runs short?
- Establish constraints: API limits, coding standards, architectural decisions
2) The Night Shift (8 Hours Max)
While you sleep, your NightAgent:
- Analyzes your codebase and requirements
- Writes code, creates pull requests, and generates documentation
- Runs tests and performs code analysis
- Researches solutions and explores implementation options
- Logs all decisions and progress for your review
3) The Morning Review
Wake up to completed work waiting for you:
- Review pull requests with detailed explanations of changes
- Test implementations in your development environment
- Provide feedback on code quality, approach, or direction
- Plan the next night’s work based on progress and priorities
The Value Proposition
Predictable Costs
- Fixed 8-hour window prevents runaway token consumption
- Transparent pricing with no surprise bills
- Budget-friendly operation during off-peak hours
Intentional Development
- Constraint breeds focus: Limited time forces clear task definition
- Better planning: You must think through requirements before handoff
- Quality over quantity: Emphasis on completing well-defined tasks
True Productivity Gains
- Sleep becomes productive time: Your downtime becomes development time
- Continuous progress: Work happens even when you are offline
- Reduced context switching: Deep, focused work without interruptions
Sustainable Workflow
- Async by design: No need to babysit the AI during execution
- Human oversight: You maintain control over quality and direction
- Realistic expectations: Positioned as a junior developer, not a replacement
Implementation Strategy
Phase 1: Core Infrastructure
┌─────────────────┐    ┌──────────────────┐    ┌─────────────────┐
│   Task Queue    │───▶│   Night Agent    │───▶│  Output Store   │
│   Management    │    │   Orchestrator   │    │   (PRs, Docs)   │
└─────────────────┘    └──────────────────┘    └─────────────────┘
Essential Components:
- Task scheduling system with configurable night windows
- Token/credit management with hard limits and monitoring
- Code repository integration: (GitHub or GitLab)
- Secure sandbox environment for code execution and testing
Phase 2: Agent Capabilities
- Code generation and refactoring
- Test suite creation and maintenance
- Documentation writing and updates
- Performance analysis and optimization
- Dependency management and security scanning
Phase 3: Workflow Integration
- Morning dashboard with progress summaries and review queues
- Feedback mechanisms for continuous agent improvement
- Integration with existing development tools (IDEs, project management)
- Team collaboration features for shared night agent resources
Technical Architecture
Core Components
1) Task Orchestrator
- Manages the 8-hour execution window
- Prioritizes tasks based on user input
- Monitors resource consumption and enforces limits
2) Code Analysis Engine
- Understands existing codebase structure
- Identifies patterns and architectural decisions
- Generates context-aware solutions
3) Review Generator
- Creates detailed pull request descriptions
- Documents decision-making process
- Provides testing recommendations
4) Progress Tracker
- Logs all activities and decisions
- Tracks time allocation across tasks
- Generates morning summary reports
Use Cases
Individual Developers
- Side project acceleration: Make progress on personal projects while sleeping
- Learning and exploration: Research new technologies or frameworks overnight
- Technical debt cleanup: Tackle refactoring and maintenance tasks
Development Teams
- Continuous integration: Automated testing and quality checks
- Documentation maintenance: Keep docs current with code changes
- Cross-timezone collaboration: Bridge time gaps between distributed teams
Agencies and Consultancies
- Client work efficiency: More billable output without extended hours
- Proof-of-concept development: Rapid prototyping and iteration
- Maintenance contracts: Automated upkeep for client codebases
Getting Started
1) Define Your Night Window
Choose your optimal 8-hour window based on:
- Your sleep schedule
- Time zone considerations
- Development workflow preferences
2) Start Small Begin with well-defined, isolated tasks:
- Bug fixes with clear reproduction steps
- Unit test creation for existing functions
- Code formatting and linting cleanup
3) Establish Review Patterns
Create consistent morning routines:
- Check the progress dashboard
- Review and test generated code
- Provide feedback for continuous improvement
- Plan the next night’s work
4) Scale Gradually
As you build trust and refine processes:
- Tackle larger, more complex features
- Integrate multiple related tasks
- Customize agent behavior for your codebase
The Future of Development
The concept of “NightAgents” represents a shift from always-on AI assistance to intentional, constraint-based collaboration. By limiting when AI can work, we create space for:
- More thoughtful task planning
- Sustainable development practices
- Predictable costs and outcomes
- True human-AI collaboration
The night shift is not a limitation, it is an actual feature. It is the difference between having an AI tool and having an AI co-worker.
– Credits: NightAgents Logo was AI-generated by Chatgpt

 ShipReport - Landing Page
 ShipReport - Index Page for Logging
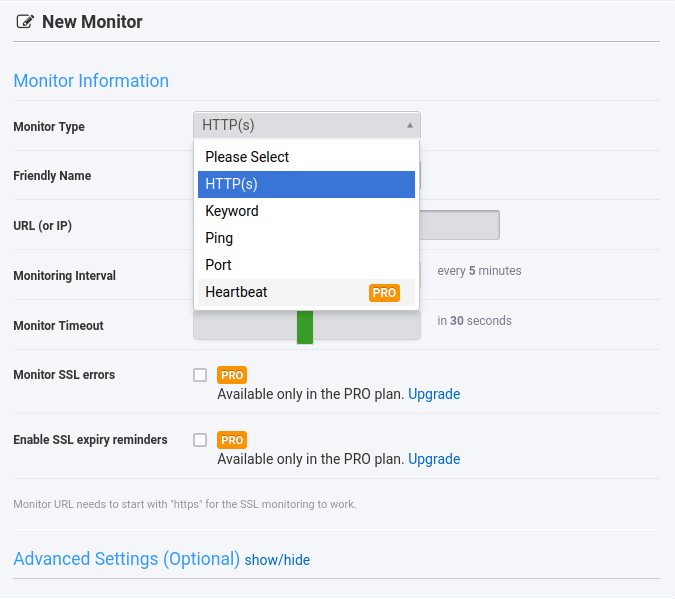
 ShipReport - Login Page
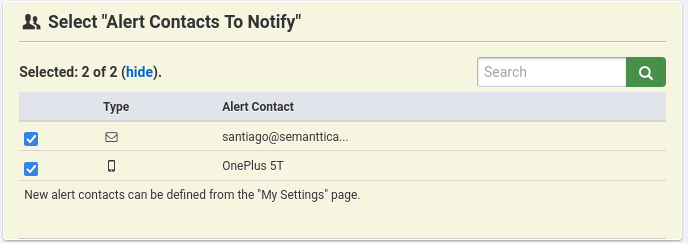